
How to Crochet Crossbody Bag?
To crochet a crossbody bag, select yarn, a matching crochet hook, and follow a pattern. Begin by chaining the desired width of the bag’s base.
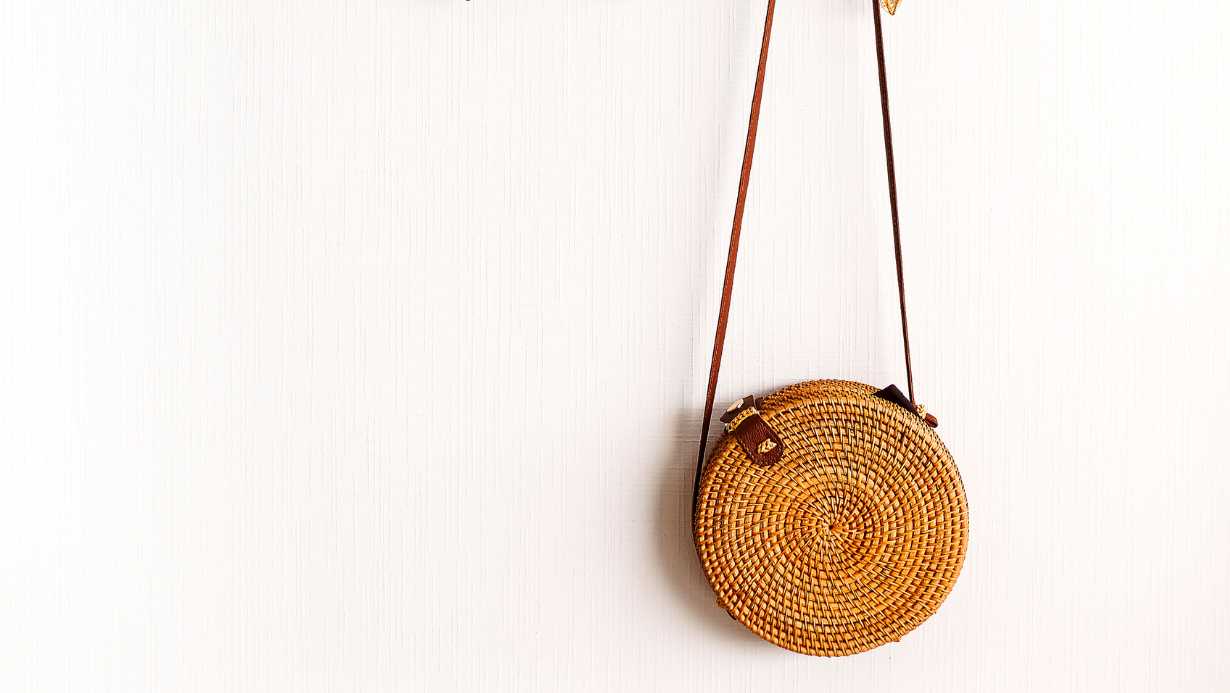
Crafting a crossbody bag through the art of crochet combines practicality with personalized style. Crocheting offers a versatile array of design options, allowing for the creation of both sturdy and fashionable bags suited to various needs. As a beginner-friendly project, a crochet crossbody bag can serve as the perfect starter piece for those looking to delve into the world of crochet crafts.
Essentials For Crocheting Crossbody Bags
Embracing the art of crochet offers a delightful way to create unique and personalized accessories, and a crossbody bag is no exception. Whether you’re a seasoned crocheter or a beginner eager to take on a new project, understanding the essentials for crocheting crossbody bags is crucial. From selecting the best yarn to choosing the perfect crochet hooks, each element plays a vital role in crafting a durable and stylish bag. Let’s look at the necessary components that will help transform your crochet vision into a fashionable reality.
Types Of Yarn Suitable For Bags
The foundation of any crochet bag is the yarn. The right type of yarn not only defines the bag’s texture and appearance but also its strength and durability. Here are some of the best yarns for bag-making:
- Cotton: Known for its sturdiness and ease of maintenance.
- Acrylic: Lightweight and available in a myriad of colors.
- T-shirt yarn: A bulkier option giving a modern and structured finish.
- Wool or wool blends: Ideal for a soft yet resilient bag composition.
Choosing The Right Crochet Hooks
A reliable crochet hook is an instrumental tool for any project. For crossbody bags, the hook size directly influences the tightness of the stitches and the bag’s overall structure. Select hooks that match the yarn weight you’ve chosen. Here’s a simplified guide:
| Yarn Type | Suggested Hook Size (US) |
|---|---|
| Cotton | G-6 to I-9 |
| Acrylic | H-8 to J-10 |
| T-shirt Yarn | L-11 to N-15 |
| Wool Blends | I-9 to K-10½ |
Other materials: lining, straps, and closures
Other Materials: Lining, Straps, And Closures
Beyond yarn and hooks, a few additional materials can elevate your crossbody bag. Consider adding a lining for enhanced durability and shaping. This could be any fabric from cotton to silk, depending on your preference. For straps, select from materials such as leather, chain, or a crocheted option for a consistent look. Lastly, explore a variety of closures like buttons, zippers, or magnetic snaps to keep your belongings secure.
- Fabric for lining: adds structure and protection to your work.
- Straps: leather, chain, or crocheted to match the style of the bag.
- Closures: choose from buttons, zippers, or snaps for security.
Starting Your Crossbody Bag
Welcome to your next crafty endeavor, where you will learn the ropes of crocheting your very own crossbody bag. This practical and stylish accessory is perfect for those on-the-go days. Starting your crossbody bag is an excitement-filled process, where your chosen yarn begins to take shape. Embrace this journey from the first loop to the final stitch, as we guide you through the foundation chain and base round to create the structure of your bag. Get your crochet hook ready; it’s time to dive into the intricate world of crochet patterns!
Foundation Chain And Base Round
The beginning of any crochet project is as thrilling as it is foundational. For your crossbody bag, it all starts with the foundation chain, which will determine the size and shape of your creation. To ensure a strong and flexible start:
- Select an appropriate yarn weight and a compatible crochet hook.
- Create a slip knot and chain the number of stitches that will serve as the width of your bag’s base.
- Join the chain with a slip stitch to form a ring if you’re working in the round, being careful not to twist the chain.
The base round builds upon your foundation, establishing the groundwork for the bag’s depth. This round requires consistent stitch patterns and stitch counts. Double-check your work to prevent any unnecessary unraveling later on.
Achieving The Desired Bag Width And Depth
Once you set up your foundation, the next step is to crochet the additional rounds that will determine your bag’s dimensions. The width of the bag is controlled by the number of stitches in your foundation chain, while the depth develops as you add more rounds to the base. Follow these tips:
- Maintain even tension as you work to ensure consistent stitch size.
- Increase at the edges if a rectangular base is desired, or evenly if working in the round for a square or circular base.
- Continue to add rounds until the base reaches the preferred depth.
- Count your stitches regularly to avoid discrepancies as the fabric grows.
Always remember that the beauty of crochet lies in the flexibility to adjust as you go. It allows you to personalize the shape and size of your bag. Keep a keen eye on your work and feel free to make modifications to achieve your vision of the perfect crossbody bag.
Crafting The Bag Body
Embarking on the journey of crocheting a crossbody bag, the most crucial element to focus on is the bag body. This part of your project defines the overall look, functionality, and durability of the crossbody bag. A well-crafted body possesses the shape and strength necessary to carry everyday essentials while exhibiting the beauty of crochet artistry through textures and patterns. In this section, we delve into how to construct a sturdy and stylish bag body that will stand the test of time and fashion trends.
Structuring The Sides For Shape And Strength
The sides of a crossbody bag are pivotal for providing form and fortitude. Building a bag that maintains its shape demands careful attention to the materials and stitches used. To achieve this:
- Select a sturdy yarn: Opt for a yarn with good tension and structure, such as cotton or acrylic blends, which hold shape well.
- Choose a tight stitch: Single crochet or slip stitch creates a dense fabric with less stretch, ideal for sides that need to support weight.
- Utilize a form of reinforcement: Consider crocheting over a cord or incorporating plastic canvas for added rigidity.
- Double up on fabric: Crochet two layers or use a thicker hook to bulk up the material, ensuring it can bear more load.
Creating a solid base and consistent side walls ensures a durable bag that doesn’t sag or lose form under the weight of carried items.
Incorporate Patterns Or Textures With Different Stitches
Aesthetics meet functionality when patterns and textures come into play. Different crochet stitches offer not just visual appeal but also can contribute to the dense structure of the bag. To spice up the bag body:
- Experiment with stitch variations: Beyond basic stitches, incorporate shell stitches, bobbles, or post stitches for a 3D effect.
- Play with color changes: Stripes, blocks, or ombre effects can add visual interest and highlight the bag’s shape.
- Integrate stitch patterns: Follow a stitch pattern to create motifs such as chevrons, grids, or waves that double as reinforcing elements.
Filet crochet: For a more open and lace-like texture, use filet crochet to create structured yet breathable panels.
Remember, while textures and patterns elevate the look of the bag, balance is key—ensure the decorative elements do not compromise the bag’s integrity.
By mindfully structuring the sides and incorporating captivating stitch patterns, your crocheted crossbody bag will not only serve as a practical accessory but also showcase your crocheting skills with its aesthetic charm.
Techniques For Sturdy And Comfortable Straps
Here’s how to ensure the straps of your crochet bag are both sturdy and comfortable:
- Choose the right yarn: Opt for a durable yarn material such as cotton, hemp, or a sturdy blend that can handle the weight and friction of everyday use.
- Use tighter stitch patterns: Stitches like the single crochet or slip stitch provide a firmer fabric suitable for straps.
- Reinforcement: Consider doubling the yarn or crocheting over a fabric or nylon strap to reinforce the strength of the crochet strap.
- Consider a lining: Attach a fabric lining to the inner surface of the strap to reduce stretch and add comfort.
Be sure to test the strap by stretching it slightly. If it stretches considerably, it may need additional reinforcement or a tighter stitch. Consistent tension throughout your work will also result in a strap that feels smooth and even against the skin.
Installing Zippers Or Magnetic Snaps
Choosing the right closure for your crossbody bag can make a world of difference in usability. Zippers and magnetic snaps are two of the most popular options for providing a secure closure.
- For zippers:
- Cut the zipper to the length of your bag’s opening, adding an inch for seam allowance.
- Align the zipper edges to the bag opening, making sure the zipper teeth face the interior of the bag.
- Use pins or stitch markers to hold the zipper in place during sewing.
- Sew the zipper on with a needle and thread or a sewing machine, backstitching at both ends for added security.
- For magnetic snaps:
- Choose the snap placement on the inside lining of the bag.
- Mark the spots for the prongs of the snap and make small slits.
- Insert the snap prongs through the slits and secure them with the backing pieces.
- Ensure the snap aligns correctly so that it closes neatly when the bag is folded over.
Both methods provide a secure way to protect your essentials with a professional touch.
Personal Touches: Pockets, Tassels, And Buttons
Personalization elevates your bag, distinguishing it with handmade charm. Consider adding practical and ornamental details.
| Detail | Functionality | Style |
|---|---|---|
| Pockets | Store smaller items separately for organization | Inside or outside, blended or contrasting colors |
| Tassels | N/A | Attach to the zipper pull or sides for a boho touch |
| Buttons | Additional closure for pockets | Vintage, modern, or whimsical, they are a statement feature |
Integrate these components into your bag for a mix of functionality and style. Remember, the aim is to craft a bag that not only serves its purpose but also showcases your creative flair.
Finalizing Your Crochet Crossbody Bag
You’ve looped, stitched, and crafted your way through the body of the bag, and now it’s time for the grand finale: finalizing your crochet crossbody bag. This phase is pivotal as it transforms your project from a simple piece of crochet to a functional accessory. Securing your strap and adding a lining will give your bag longevity and a professional finish, ready to show off your craftsmanship and style.
Attaching The Strap Securely To The Bag
Choosing the right method to attach your strap is as crucial as the making of the bag itself. You want to ensure that your strap stays in place, no matter what treasures you carry. Begin by selecting a durable yarn or a strong thread that complements your bag’s design for a seamless look.
| Step | Instruction |
|---|---|
| 1 | Position the strap ends to the inner sides of the bag’s opening, ensuring they are evenly spaced and aligned. |
| 2 | Use a tapestry needle and your chosen yarn or thread to stitch the strap in place. An ‘X’ shape or box stitch can provide extra strength. |
| 3 | Reinforce the attachment by going over the same stitches several times. |
Always check the attachment for any gaps or weaknesses to avoid any future mishaps.
Tips For Lining Your Bag For Durability And Finish
A lining can greatly increase the durability of your crochet crossbody bag, protect your items, and give a beautiful finish. Start by selecting a lightweight fabric that won’t weigh down your crochet but is still sturdy enough to protect the stitches.
- Cut the fabric to match the shape of your bag, allowing extra for seams.
- Fold the edges of the fabric to create clean lines and iron them flat for ease of sewing.
- Place the lining inside the crochet bag, and pin it to secure it in place.
- Hand sew or use a sewing machine to stitch the lining to the top edge of the bag, removing pins as you go along.
Frequently Asked Questions For How To Crochet Crossbody Bag
What Is The Best Stitch For Crochet Handbags?
The single crochet stitch is ideal for crochet handbags due to its sturdy and dense fabric, perfect for durability.
Can A Beginner Crochet A Bag?
Yes, a beginner can crochet a bag. Start with simple patterns and basic stitches, then progress to more complex designs.
How Do You Make A Crochet Bag Stiff?
To stiffen a crochet bag, utilize fabric stiffener, apply a sugar starch or homemade cornstarch mixture, or try commercial spray starch. Allow thorough drying for best results.
What Crochet Hook To Use For A Bag?
For a crochet bag, use a hook size that matches your yarn weight; commonly, a 5mm to 6mm hook works well for sturdy bags. Always check the yarn label’s recommended hook size.
Final Words ON How To Crochet Crossbody Bag
Crafting your own crochet crossbody bag can be a rewarding project. It’s a chic, practical accessory that showcases your skills. Remember to choose the right yarn and pattern for your skill level. Start small, take your time, and soon you’ll have a custom-made bag that’s sure to turn heads.

Hi I am Fahad, the mastermind behind the bag revolution. Join me on a journey where style meets sustainability and discover a world of extraordinary bags.


One Comment