
How to Make a Crossbody Bag Out of Fabric?
To make a crossbody bag out of fabric, follow these steps: Cut out two rectangles of fabric for the main body of the bag, two smaller rectangles for the lining, and two long strips for the straps. Sew the two main body fabric rectangles together, right sides facing, leaving the top open.
Sew the lining rectangles together in the same way, but leave a small opening for turning. Attach the straps to the main body of the bag by sewing them to the sides. Turn the main body of the bag right side out, then tuck the lining inside and sew the top closed. Finally, add any additional decorations or closures to customize your bag.
Crossbody Bag Sizing
When it comes to choosing the right size for a crossbody bag, it ultimately depends on your personal style and needs. Crossbody bags come in various sizes, ranging from small to medium to large, each catering to different purposes.
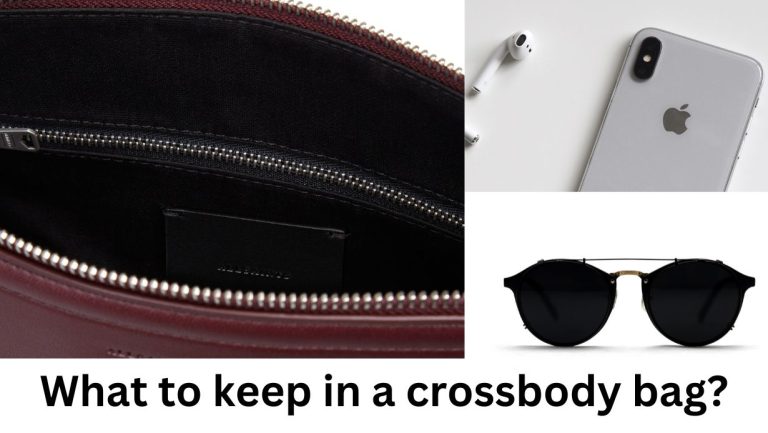
If you prefer a minimalist approach and only need to carry a few essentials, a small crossbody bag would be perfect for you. Medium-sized crossbody bags offer a bit more room, allowing you to carry additional items like a small notebook or makeup essentials. For those who need to carry more, a large crossbody bag provides ample space to hold your belongings while still maintaining its stylish and compact design.
It’s important to consider the dimensions and compartments of the crossbody bag to ensure it can accommodate your specific needs. Some crossbody bags may feature interior pockets or compartments for better organization, while others may have exterior pockets for easy access to frequently used items.
Supplies And Cutting Instructions
Before you begin making your own crossbody bag out of fabric, you’ll need to gather a few supplies. Here is a list of everything you’ll need:
| Supplies | Quantity |
|---|---|
| Fabric | 1 yard |
| Lining fabric | 1 yard |
| Interfacing | 1 yard |
| Zipper | 1 |
| Thread | Matching color |
| Scissors | 1 pair |
| Ruler | 1 |
| Pins | Several |
| Sewing machine | 1 |
Once you have all your supplies ready, you can move on to cutting the fabric. Follow these instructions to ensure you get the right dimensions:
List Of Supplies Needed
- Measure and cut two rectangles from your main fabric, each measuring 12 inches by 16 inches. These will form the front and back panels of your bag.
- Cut two smaller rectangles from your lining fabric, each measuring 12 inches by 16 inches. These will be the lining for the front and back panels.
- Cut one long strip of fabric from your main fabric, measuring 4 inches by 40 inches. This will be the strap of your crossbody bag.
- Cut two smaller rectangles from your main fabric, each measuring 6 inches by 8 inches. These will be the pockets for the inside of your bag (optional).
- Cut two rectangles from your interfacing, each measuring 12 inches by 16 inches. These will provide structure to your bag.
Make sure to double-check your measurements and adjust as needed before cutting the fabric. Taking your time at this stage will ensure that your crossbody bag turns out just the way you want it.
Step-by-step Tutorial For Making A Crossbody Bag
In this step-by-step tutorial, we will guide you through the process of making a crossbody bag out of fabric. Whether you’re a beginner or an experienced sewer, you’ll find these instructions easy to follow and the end result will be a unique crossbody bag that you can be proud of.
Sewing The Main Body Of The Bag
- Cut out two identical pieces of fabric for the main body of the bag. These can be any size you prefer, but a typical size is around 10 inches by 15 inches.
- Place the two pieces of fabric right sides together and pin them in place.
- Using a sewing machine, sew along the sides and bottom of the fabric, leaving the top open. Make sure to backstitch at the beginning and end of each seam to secure the stitches.
- Trim the excess fabric and clip the corners to reduce bulk.
Adding A Zipper Pocket And Card Slots
- Decide on the size and placement of your zipper pocket. Cut out a rectangle of fabric for the pocket, making sure it is slightly smaller than the desired finished size.
- Sew the zipper onto the fabric, ensuring that it is centered and aligned.
- Attach the zipper pocket to the interior of one of the main body fabric pieces. Sew around the sides and bottom to secure it in place.
- To create card slots, cut out several small rectangles of fabric.
- Fold each rectangle in half lengthwise and sew along the edges to create a pocket.
- Attach the card slots to the interior of the other main body fabric piece, ensuring they are evenly spaced.
Creating An Adjustable Strap
- Measure and cut a long strip of fabric for the strap. The length will depend on your personal preference, but a good starting point is around 50 inches.
- Fold the fabric strip in half lengthwise and sew along the edge.
- Turn the fabric strip right side out and press it with an iron to create a crisp edge.
- Attach the strap to the sides of the main body fabric pieces, using a box stitch for added strength.
Preparing The Bag Interior And Slip Pockets
- Cut out two rectangular pieces of fabric for the bag interior. These should be the same size as the main body fabric pieces.
- Sew slip pockets onto one of the interior fabric pieces, ensuring that they are evenly spaced and securely attached.
- Place the two interior fabric pieces right sides together and sew along the sides and bottom, leaving the top open.
- Turn the interior fabric right side out and press it with an iron to create crisp edges.
- Insert the interior fabric into the main body fabric, aligning the top edges. Pin in place.
- Sew around the top edge of the bag to secure the interior and main body fabrics together.
And there you have it! You’ve successfully made a beautiful crossbody bag out of fabric. Feel free to get creative with your fabric choices and embellishments to make it truly unique to your style. Happy sewing!
Frequently Asked Questions Of How To Make A Crossbody Bag Out Of Fabric
How Do You Make A Crossbody Bag?
To make a crossbody bag, follow these steps:
1. Gather fabric and cut out pattern pieces.
2. Sew the front and back panels together, leaving an opening for the flap.
3. Attach a zipper or closure to the top edge of the bag.
4. Sew the straps to the sides of the bag.
5. Optional: Add pockets or compartments inside the bag. That’s it! You now have a crossbody bag.
What Is The Difference Between A Messenger Bag And A Crossbody Bag?
Messenger bags and crossbody bags differ in their main features. Messenger bags have a large compartment and a flap closure, making it easy to access items frequently. Crossbody bags have a long strap worn diagonally across the body. They are often made of high-quality leather.
What Size Is A Cross Body Bag?
A crossbody bag is a bag with a long strap worn diagonally across the body. It hangs at hip height on the opposite side. The size of a crossbody bag varies but is typically compact and small enough to carry essentials.
What Makes A Purse A Crossbody Bag?
A crossbody bag is a purse with a long strap that is worn diagonally across the body. The bag hangs at hip height on the opposite side and the strap can be adjusted for desired height.
Final Thoughts ON How To Make A Crossbody Bag Out Of Fabric
Making a crossbody bag out of fabric is a fun and creative project that allows you to customize your own bag to suit your style and needs. By following the step-by-step tutorial and using your favorite fabric, you can create a stylish and functional bag that is perfect for everyday use.
Whether you are a beginner or an experienced sewer, this DIY project is a great way to showcase your sewing skills and create a unique accessory that you can be proud of. So grab your fabric, sewing machine, and get ready to make your own crossbody bag!

Hi I am Fahad, the mastermind behind the bag revolution. Join me on a journey where style meets sustainability and discover a world of extraordinary bags.


One Comment