
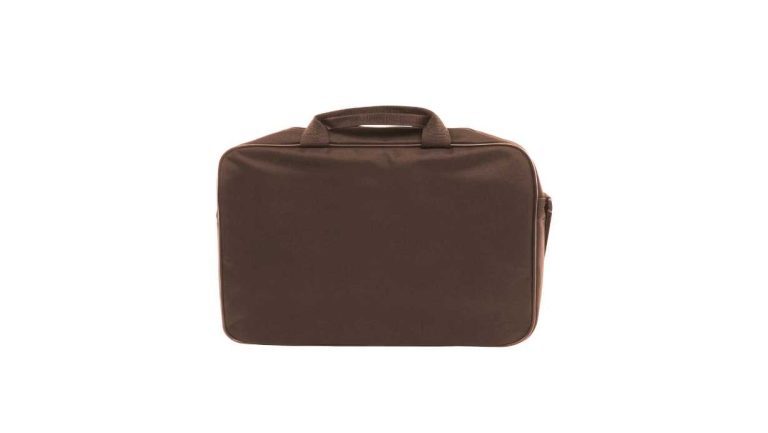
How to Make a Laptop Bag With Handles?
To make a laptop bag with handles, gather the necessary materials and measurements, cut the fabric according to the dimensions, sew the main body and pockets together, attach the handles securely, and add any additional features such as closures or padding as desired. This DIY project allows you to create a customized and functional laptop bag specifically suited to your needs and style.
Get ready to showcase your creativity while ensuring your laptop’s safety and convenience. Whether you’re a seasoned sewing enthusiast or a beginner looking for a fun and practical project, making a laptop bag with handles is a worthwhile endeavor. Grab your sewing machine, gather your supplies, and let’s get started!
Choosing The Right Material
Making a laptop bag with handles requires choosing the right materials. Opt for durable and water-resistant fabrics to ensure longevity and protection for the laptop. Additionally, consider incorporating a padded interior for added protection against bumps and scratches.
Measuring And Cutting The Fabric
To make a laptop bag with handles, the first step is to measure and cut the fabric. Determining the bag dimensions is crucial to ensure the bag is the right size for the laptop. Measure the width, height, and depth of the laptop, adding a few inches for wiggle room. This will give you the dimensions for the main panels of the bag.
Next, you’ll want to cut the panels and straps from the fabric. Use a ruler or measuring tape to mark the desired dimensions on the fabric, and then carefully cut along the lines. It’s essential to cut accurate and straight lines to ensure the bag comes together neatly.
Once the panels and straps are cut, you can move on to the next steps in making the laptop bag. Remember to measure twice and cut once to avoid any mistakes in the fabric cutting process.
Sewing The Bag Together
To make a laptop bag with handles, start by sewing the panels together. First, prepare the panels by cutting them according to your desired bag size. Next, pin the panels together, leaving an opening for the handles and closure. Then, sew the sides and bottom of the bag, reinforcing the edges for durability. After that, attach the handles by sewing them securely in place, making sure they are evenly spaced.
Finally, add a zipper or Velcro closure to keep your laptop secure. For a zipper closure, sew one side of the zipper to the top opening of the bag, making sure it is centered. For a Velcro closure, sew a strip of Velcro along the edges of the bag opening, ensuring a secure closure. With these steps, you can create a stylish and functional laptop bag with handles.
Adding Finishing Touches
Adding Finishing Touches: When reinforcing seams, make sure to use a heavy-duty needle to prevent breakage. Topstitching adds a polished look, so use a thread color that complements the fabric. Take your time and use a longer stitch length for a professional finish. For added durability, use a walking foot to prevent shifting and ensure a clean, straight topstitch. Pay attention to details, such as backstitching at the beginning and end of each seam, for a secure hold.
Customizing Your Laptop Bag
How to Make a Laptop Bag With Handles
Making a customized laptop bag is a creative way to showcase your personal style. One way to customize your bag is by adding pockets or compartments. These additional storage spaces make it easy to keep your laptop accessories organized and easily accessible. Consider adding pockets on the outside of the bag for items like chargers and headphones, and compartments on the inside to securely hold your laptop.
Another way to personalize your laptop bag is through embroidery or applique designs. You can choose to add your initials, a logo, or a unique design to make your bag truly one-of-a-kind. By incorporating these customization options, you can create a laptop bag that not only protects your device but also reflects your personal style.
Frequently Asked Questions On How To Make A Laptop Bag With Handles
How Can I Make A Laptop Bag With Handles?
To make a laptop bag with handles, you will need a sturdy fabric, sewing machine, and basic sewing skills. Start by cutting out the fabric pieces for the bag and handles, then sew them together. Don’t forget to leave an opening for the laptop and add a zippered pocket for accessories.
Finally, attach the handles securely, and you’re done!
What Materials Do I Need To Make A Laptop Bag With Handles?
To make a laptop bag with handles, you will need a sturdy fabric like canvas or denim, a sewing machine, strong thread, a zipper, interfacing for added durability, and a pair of sturdy handles. Additionally, you can also consider adding padding or foam for extra protection.
Can I Customize The Design Of My Laptop Bag With Handles?
Absolutely! You have the freedom to customize the design of your laptop bag with handles. From choosing different colors and patterns of fabric to adding personalized patches or embroidery, you can make it unique and reflect your style. The only limit is your imagination!
HOW TO CLEAN SAMSONITE LAPTOP BAG?
To keep your Samsonite laptop bag looking fresh and clean, begin by gently wiping down the exterior with a soft cloth dampened with warm water and a mild soap solution. Be cautious not to saturate the cloth; a damp, not drenched, cloth will suffice. Afterward, rinse the bag with clean water and dry it thoroughly with another soft cloth. Allow the bag to air dry completely before stowing it away in a dry, cool area.
Final Thoughts On How to Make a Laptop Bag With Handles
In crafting your own laptop bag with handles, you’ve not only honed your creativity, but also personalized a practical accessory. The process, though it may seem daunting at first, allows for a rewarding experience that will result in a unique and functional product.
By following the steps and adding your personal flair, you’ve now mastered the art of creating your very own laptop bag with handles.

Hi I am Fahad, the mastermind behind the bag revolution. Join me on a journey where style meets sustainability and discover a world of extraordinary bags.


One Comment